From the workshop: wheel building for amateurs
- Blu Acciaio Editor

- Dec 20, 2019
- 17 min read
Updated: Dec 10, 2024
This article deals with wheel building and wheel truing. Much has already been written about this topic, and we hardly add anything new here. Still, this is our take on it, and mostly as a reminder on how the basic steps go, so its easy to get back into it after some time. After all, done right, these wheels should last a few years before needing a rebuild. A welcomed perk of learning to build you own wheels, is that truing and spoke replacements become second nature, making roadside repairs and maintenance a breeze.
Mostly we base our insights on the writings of Sheldown Brown and Roger Musson, as well as a whole lot of forums and what not. We also found this walk-through, which is to the point and quite good (only in Norwegian).
Needless to say, follow the instructions in this article at your own risk. Riding a bicycle wheel that is not properly build is a dangerous business. We find it good practice to always do a peer review of our builds before hitting the road, for instance at the local bikeshop.
These are the steps needed to build the wheel. Go through them step by step or jump directly to any one of them if you are already in the build process.
1. Preparations
But before you start, make sure you got everything you need. It is not much, but there are a few tools you probably wont use for other tasks, namely: truing stand, dishing tool, rim, spokes, nipples, hub, tension meter, spoke wrench, nipple driver and some light oil.
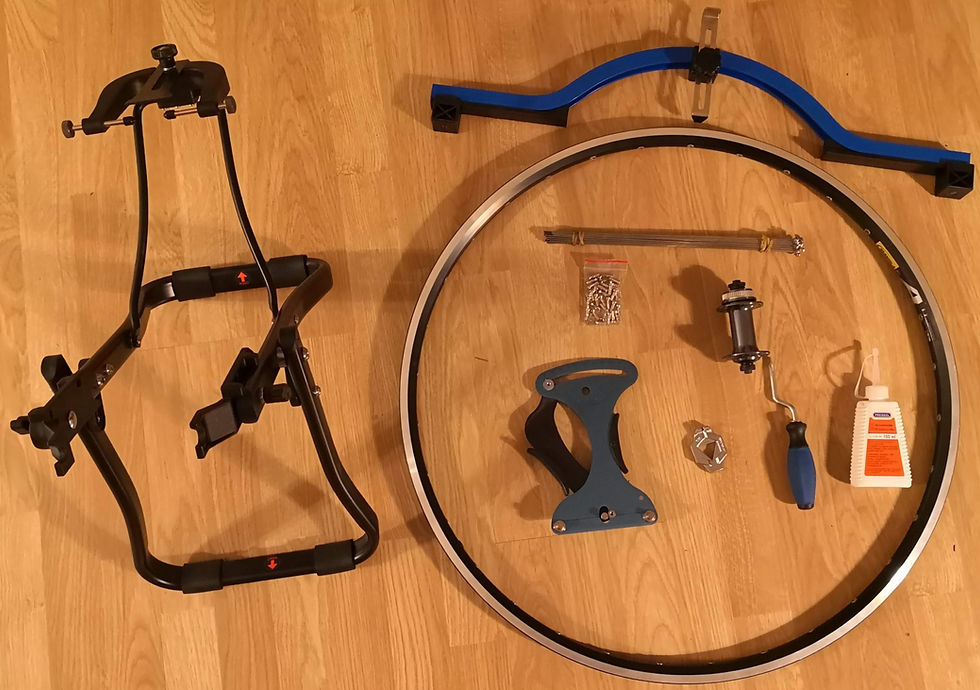
For the following, we assume we are building a front wheel from scratch. Thats to say, we need a fresh front hub with disc brake, unused plain gauge spokes and new nipples. We use a 32 hole hub and of course a matching rim, with angled spoke holes. We go here for a three cross lacing pattern, which we understand is widely used. Before you begin, make sure you know what side is left and right of the hub, relative to the direction of travel. For reference we usually colorize two spokes in red. This will make it easier for us later on to see when we have done a full round of the wheel. And also, those colored spokes are so aesthetically pleasing. If you do colorize the spokes, make sure to spray them and not paint them. Any paint will crack and fall of as the spokes inevitably twist, turn and stretch when riding. You could of course skip the colorizing altogether and just use a piece of tape for reference instead..
Obviously, getting the spoke length right is crucial. Our experience is that the spokes can be plus / minus 2 mm off from the recommended length. Anything more than that will cause problems. If they are too long you risk either being unable to bring up the tension enough or the spokes may protrude beyond the nipple, damaging the rim tape and ultimately the tube. If they are too short you will bring up the tension too much before there is sufficient connection between spoke and nipple, and you risk damaging the hub flanges and rim holes as well. The required spoke lengths usually differ marginally for the left and the right side, particularly on rear wheels with cassette as the angles will be different on the drive and non-drive side. Pay special attention when measuring the flanges, as they can have different diameters or differences in offset. Some of the spoke calculators out there are super helpful, we would say essential, to get this right. We use the ones provided by Pro Wheelbuilder and Spoke Length Calculator. This article by Park Tool is useful for finding the right measurements.
2. Oil the spokes and rim
Start out by oiling the spokes and the rim eyelets. This will help the spokes and nipples to seat more easily in the eyelets as you bring up the tension in the wheel.

3. Lace the first spoke set (right flange)
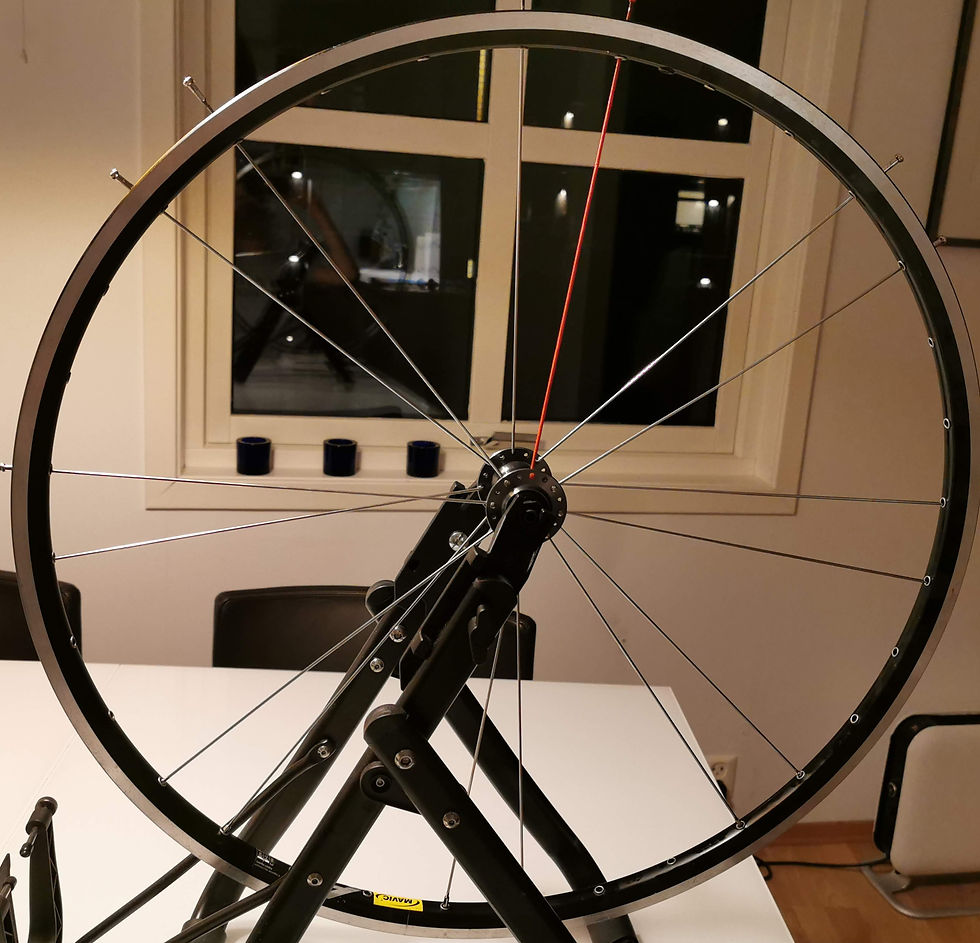
Next, start lacing the wheel. We always work on the wheel from the right side (of the hub, relative to the direction of travel). If you plan to do this as well, remember to always mount the wheel in the truing stand as you would mount it in the fork, making sure that the right side is relative to the direction of travel. Insert eight spokes into the right flange of the hub. Insert them from the outside, so they run up against the inside of the flange. This is the first set of spokes and they are inserted into every other hole. Although of no practical meaning, its nice to align the label on the hub with the valve hole. This is the way of connoisseurs. It is done by locating the hole left of the label, then count three holes to the left, and insert the first spoke of the first spoke set in that hole.
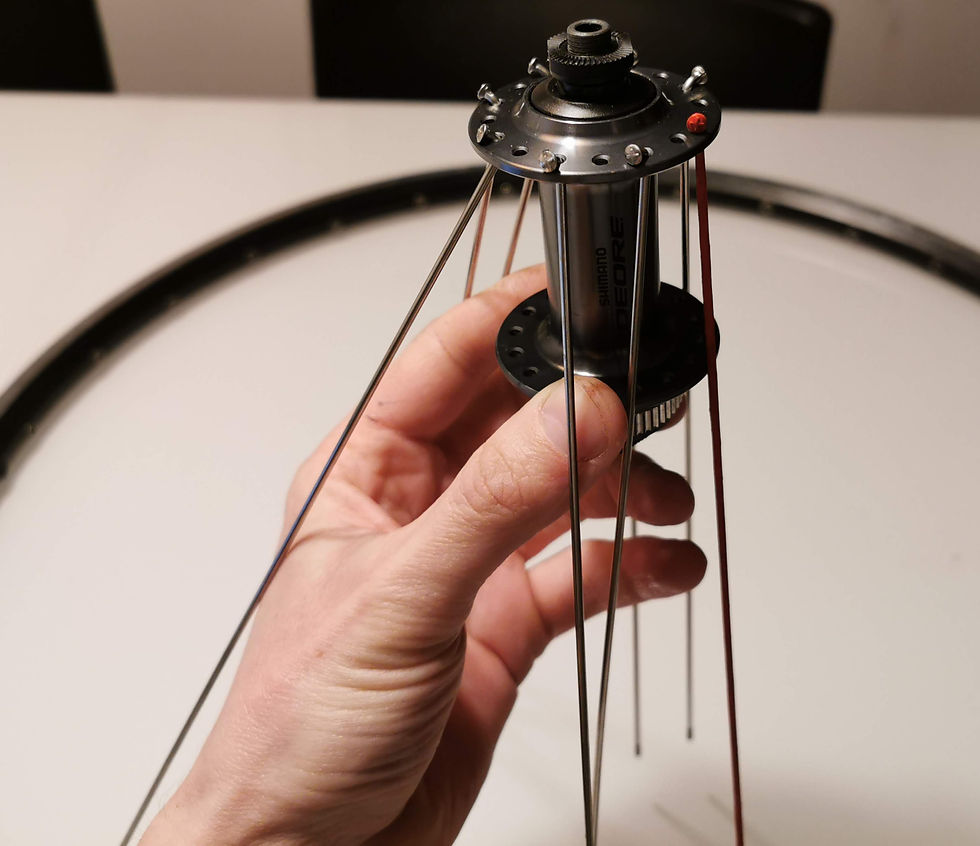
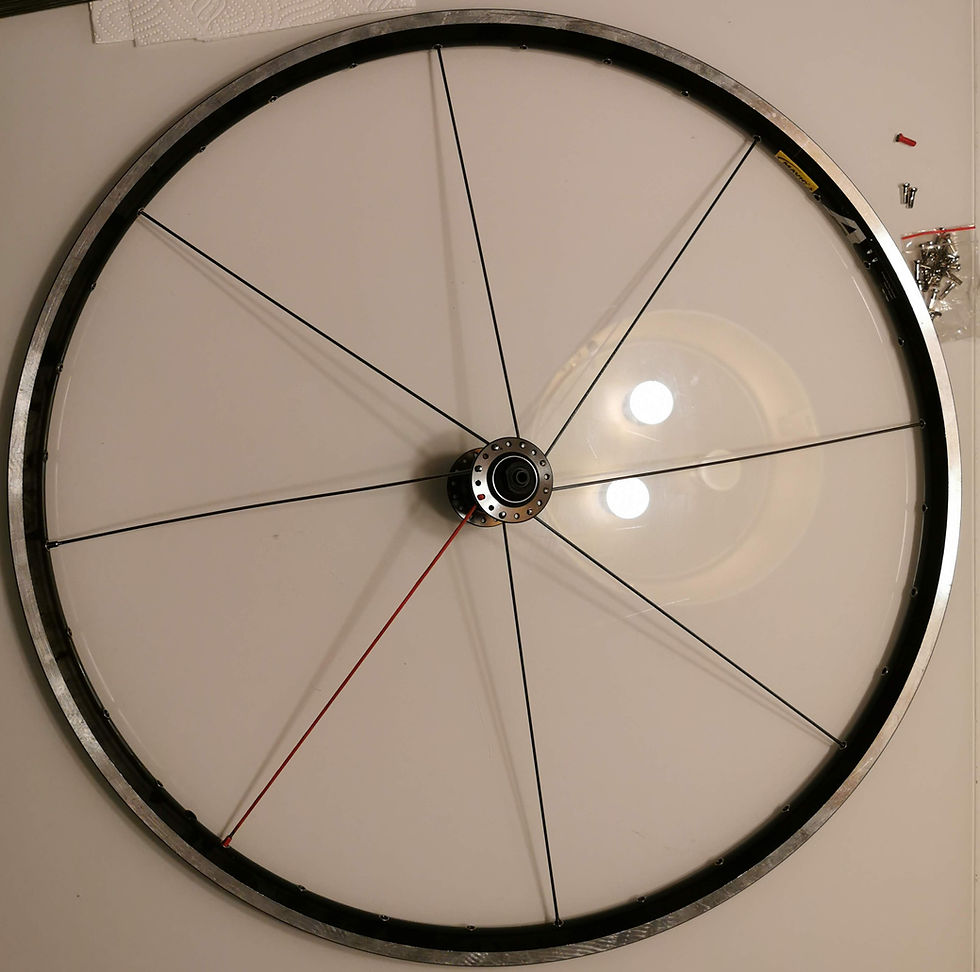
Now, rotate the rim so that the valve hole is at the top. Remember that you should now be looking at the rim from the right, in the direction of travel. Insert the spoke you aligned with the label in the hole to the left of the valve. We tend to use rims where the spoke eyelets are offset to the left and right. In that case, make sure that the spokes of the first set all are connected to eyelets offset to the right. After the first spoke, which was our red spoke by the way, place the next seven spokes in every 4th hole. If you do this right, they will all be in eyelets offset to the right, but do double check. If you get this wrong, everything else will be wrong later. As the spokes are connected to the rim, attach the nipples. At this time the nipples should be barely connected to the spoke, but just super loose with a few turns.
4. Lace the second spoke set (left flange)
The next step is to insert the second set of spokes. To identify where in the left flange the first spoke of the second set should be inserted, look at the wheel from the right side (of the hub, relative to the direction of travel). Look at the first spoke of the first set and locate the hole in the left flange to the left of this spoke. This is the hole where the first spoke of the second set should be inserted. All of the spokes in the second set should also be inserted from the outside, so they run up against the inside of the flange.
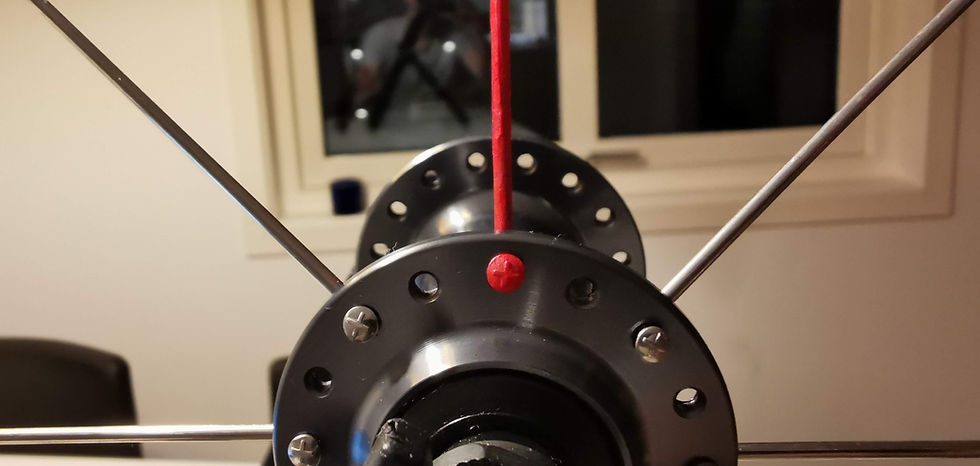
Connect all of the spokes in the second set to the left of the spokes from the first set. Make sure that the spokes of the second set, that are connected to the left flange, are connected to eyelets offset to the left. If you have done the previous steps correctly, this should happen by itself, but we find it best to double check. Attach the nipples in the same manner as for the first set of spokes.
5. Lace the third spoke set (right flange)
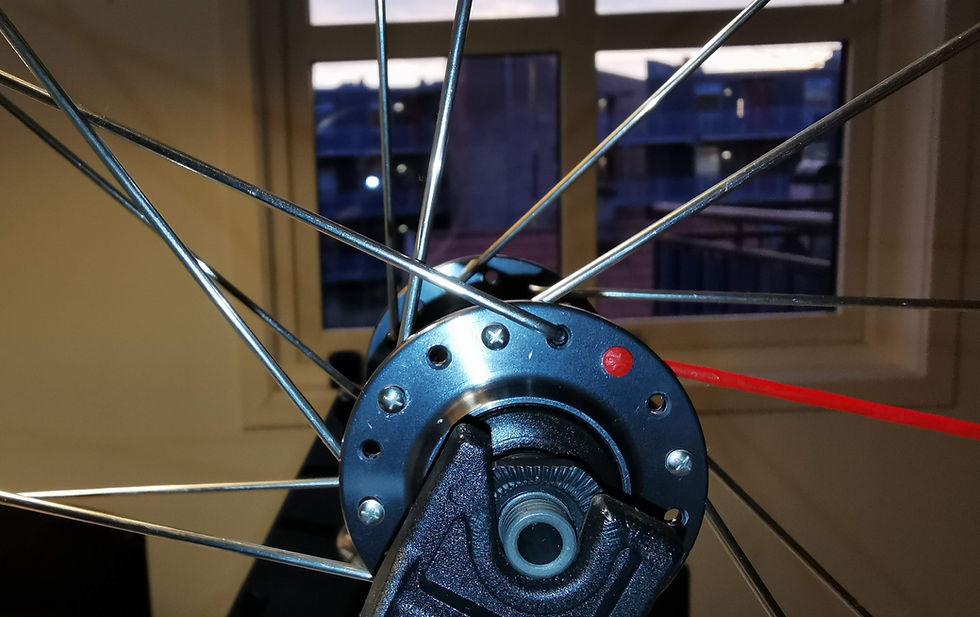
The next step is to get in place the third set of spokes. Still looking at the wheel from the right side, relative to the direction of travel, rotate the hub counterclockwise. This should make the spoke to the left of the valve hole to lean to the left, away from the valve hole. Make sure you get this correct, otherwise the valve hole will end up just below crossing spokes, making it cumbersome to inflate the tire. When you have the hub rotation all set, insert the spokes of the third set into the right flange. These spokes should be inserted from the inside of the flange, so they run up on the outside of the flange. It doesnt matter which spoke you insert first. But do note that, at the hub, these spokes clearly lean in the opposite direction of the spokes from the first set.
Since this is a three cross lacing pattern, each spoke will cross three other spokes. The spoke should first cross directly over the nearest spoke to the left, just at the elbow. There will then be an empty hole in the flange, at least until you have inserted all spokes from the third set. Then you cross over the second spoke, which is the first one to the left after the empty hole. And then finally, after yet an empty hole in the flange, you cross under the third spoke. You will see that there are two available eyelets to connect the spoke to. You gots to choose the one in the middle of those spokes from the first set, which is already connected to the eyelets offset to the right. This means the spoke you are working with will be inserted to the left of the two spokes already in place, assuming the part of the wheel you are working on is facing up. Until you get most of the third set of spokes in place, the hub may slip back in a clockwise direction. Make sure the hub is fully rotated counter-clockwise as you insert each of the third set of spokes. Attach the nipples in the same manner as for the first set of spokes.
6. Lace the fourth spoke set (left flange)
Its now time to connect the fourth and final set of spokes. This is simply done by repeating the same procedure as you did for the third set, above. In our opinion, this is the only time where it could be useful to work at the wheel from the left side. But at this time its not so critical which way you are working the wheel, since the fourth set will only fit the way they are supposed to be. That is of course, assuming you have done the previous steps correctly. When the fourth set is in place, the wheel is complete, but nowhere near done.
On a few occasions we have experienced problems lacing the fourth set of spokes. It seems as if the spokes are simply not long enough, even though they positively are of sufficient length. We think this might be caused by the spokes actually being a tad too long. They are not too long to actually fit, but the excessive length allows the hub to be rotated too far when lacing the third set of spokes. This increased rotation causes to steep an angle for the spokes, relative to the rim, and thus too far distance between the flange and the rim, making it appear as if the spokes are too short, even though they are not. To remedy this situation we tend to back of the rotation of the hub a little bit, and also to lace the third and fourth spoke sets in parallel. It complicates the build process a bit, but seems to be a viable workaround.
7. Preliminary review
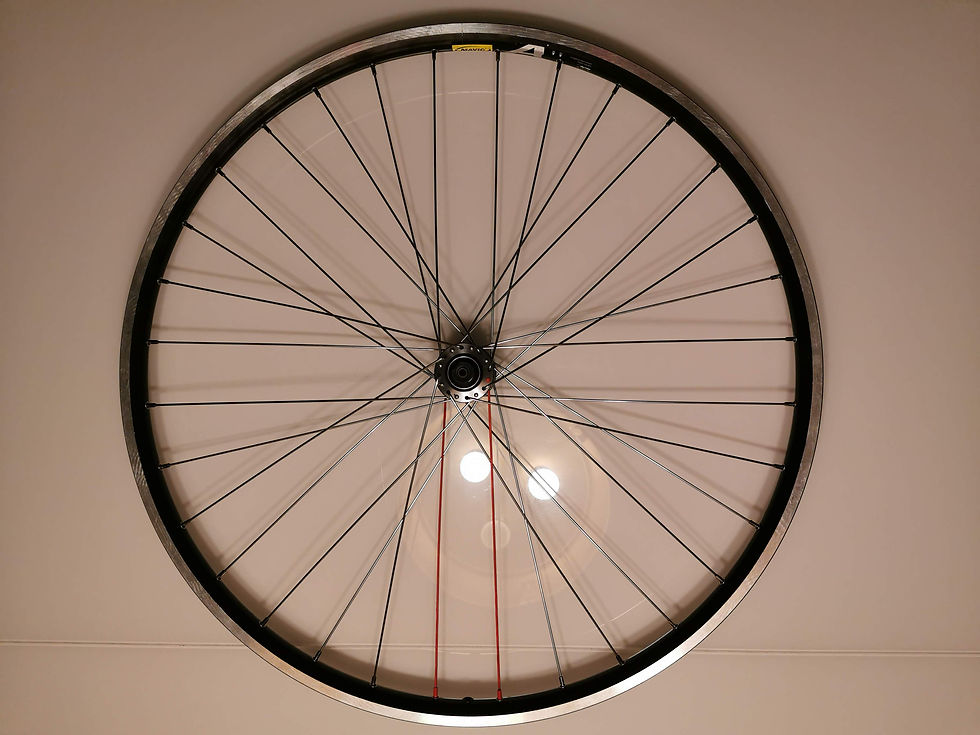
Its now time to do a first review of the wheel. Start by checking the triangles at both sides of the wheel. They should all be fairly symmetric and evenly spaced. Also check that spokes from the right flange are connected to eyelets offset to the right, and likewise, that spokes from the left flange are connected to the eyelets to the left. Check that the spokes right and left to the valve hole run in parallel.

8. Initial tightening of spokes
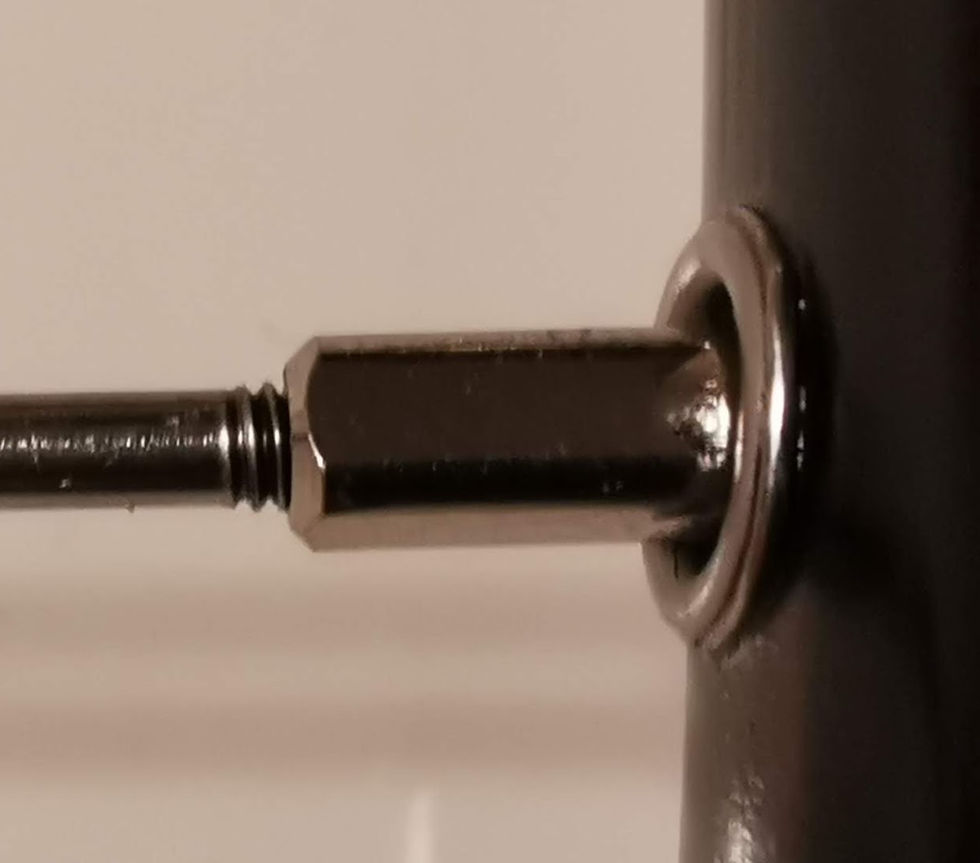
Check that no nipples are loose, but do not tighten them properly at this time. Work your way around the wheel and gently tighten the nipples so they just about cover the threads of the spoke. Do this in increments, and if need be, do more rounds on the wheel and always full rounds.
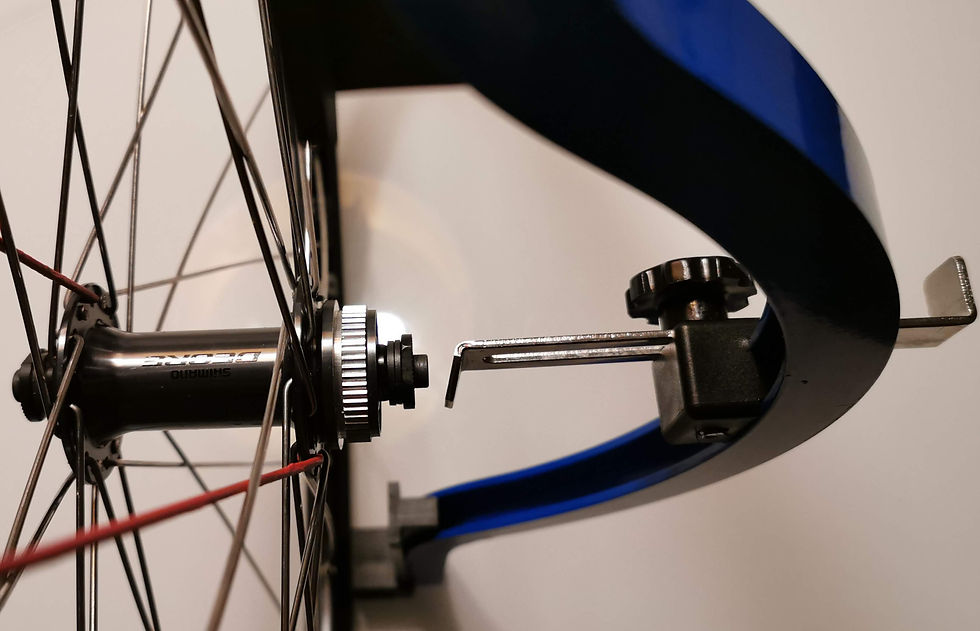
9. Sort out major dish problems
Before bringing up the tension in the wheel its a good idea to sort out major dish problems, that is to say undesired offset to either left or right in excess of a few millimeters. Dishing is about centering the hub laterally, relative to the rim, meaning that both locknuts of the hub protrude equally to the left and right of the rim. If the right locknut is too far to the right, always relative to the rim, tighten the spokes on that side, the right side. This will draw the rim to the right, and thus raising the rim (where you put the dishing tool when measuring) relative to the locknut and the hub will float to the left. As a rule of thumb, if the dishing tool protrudes towards the hub beyond the locknut, the hub is too far to the side you are currently measuring. In that case, increase spoke tension on that side. This will bring the rim to that side and letting the hub float the opposite way. If there is a gap between the dishing tool and the locknut, the hub is too far towards the side you are not measuring. In that case, increase spoke tension on the side you are not measuring. This will move the rim away from the dishing tool, pushing the hub the opposite way, towards the dishing tool, thus reducing the gap. If the spokes become too tight you could apply the same logic in reverse by loosening spokes.
Its super easy to get this wrong and the explanation above is probably not the best, but it helps us to remember the main principle of dishing. If you do not possess a dishing tool, you could also flip the wheel in the truing stand for a quick check. But then remember that it is the rim, not the hub that you are effectively measuring. So if the truing stand is not true, so to speak, this approach could lead you astray. And as always, keep in mind that the effect by tightening the spokes just a little, is greater than one would think. And in any case, be careful not to tighten the spokes too much at this time. You just want to sort out major dishing errors.
Remember also that you cant actually get the dishing itself wrong, this is determined by the components, given that you get the tension and centering of the hub correct.
10. Bring up the spoke tension
At this time all the spokes are still fairly loose and need to be tightened, although not too much. Start at any spoke, but remember which one, and go around the wheel one full rotation. Tighten all spokes, both left and right, one full turn of each nipple. If you come across some spokes that are considerable tighter than other, there might be something wrong. Because at this point they should all be loose, But in general, you should need to tighten all spokes at this time, and dont skip any. Dont make the spokes too tight though, just make the wheel a bit firmer. The reason is that you need some wiggle room to adjust both radial and lateral trueness later, as well as adjusting the dish. Still, you might need to do two rotations on the wheel. Make it a habit to always check the dish and correct large dishing errors as early as possible. Get the direction of tightening and loosening in your fingers. Remember to keep the tension lower on the left side as long as possible, as this side will usually end up having the higher tension due to the brake rotor.

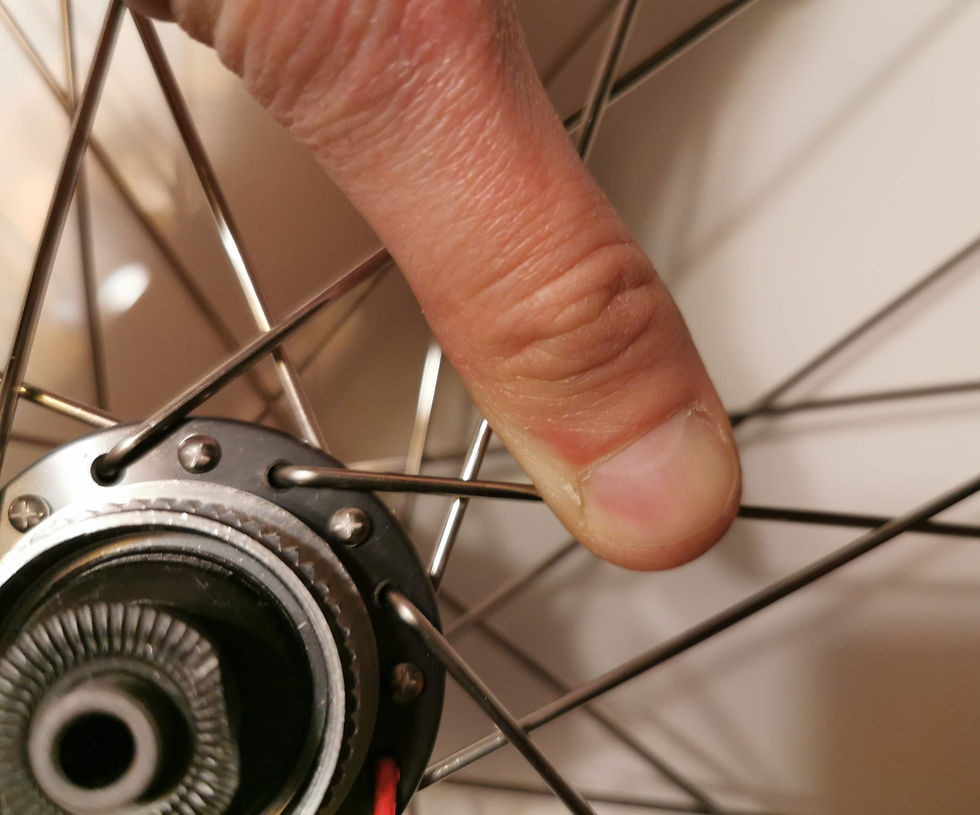
11. Align spokes
Align all outer spokes so they run as straight as possible to the rim. This is done by pressing the spoke into the wheel, close to the elbow.
12. Increase spoke tension
Now tighten the spokes some more. Do it carefully and in small increments, always working your way all around the wheel. Check the dish regularly so you dont have to deal with large dishing errors at the end, when the tension is high.
13. Adjust lateral trueness
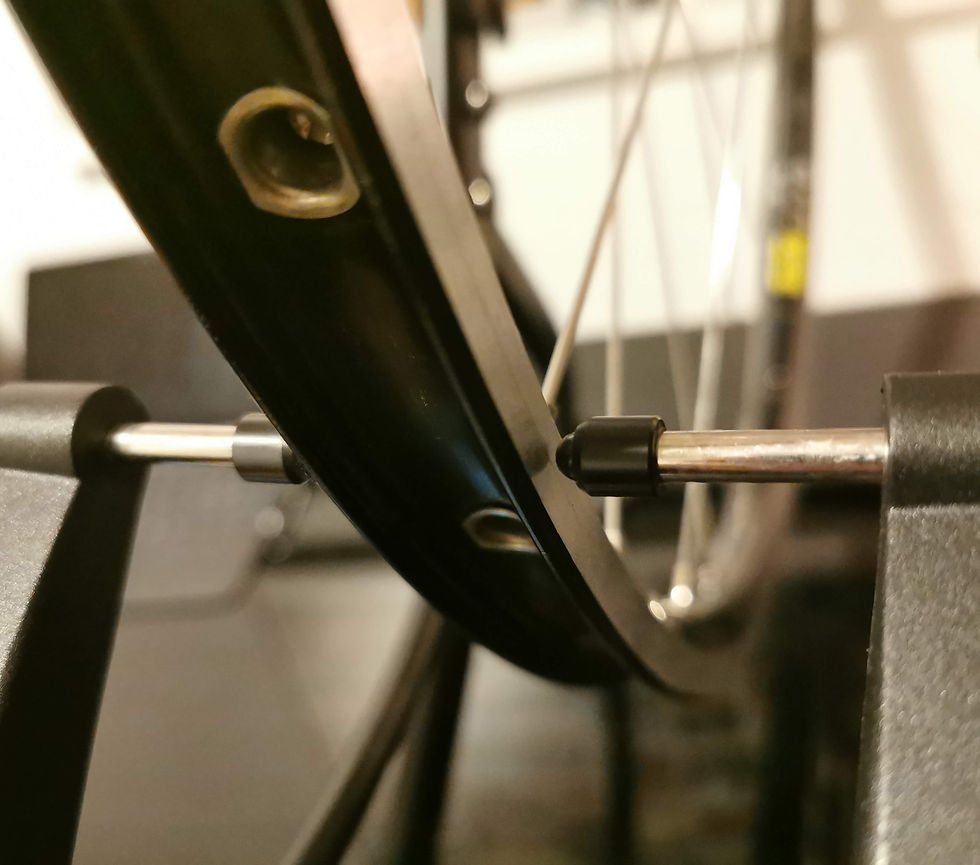
At this time the wheel should start to get quite firm and its time to really tune in on the lateral trueness. Start by locating the largest runout and review the spokes in that vicinity. If the runout is to the right, i.e. that the rim is touching the reference point to the right, tighten the spokes on the opposite side, the left side. If the spoke tensions are getting too high, you could also loosen the spokes on one side of the runout, the right side in this case. And vice versa, if the runout is to the left.
Keep in mind that tightening a spoke pulls the rim towards the direction of the flange the spoke is connected to. Meaning that if you tighten a spoke connected to the right flange, you will pull the rim to the right. Correspondingly, loosening a spoke connected to the right flange will let the rim float to the left. Always remember that easy does it. Small adjustments have greater effect than you would think.
14. Adjust radial trueness
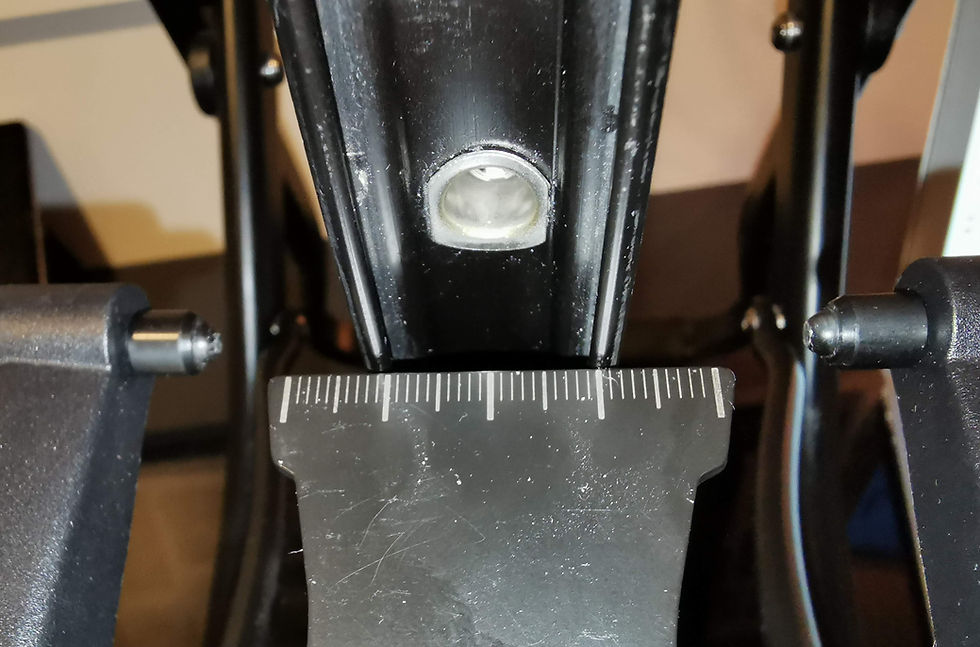
When you have the lateral trueness all dialed in, get the radial trueness under control. Spin the wheel slowly and look for low or high spots, that is to say spots where the rim is either too close or too far away from the hub. If you find a low spot, loosen the spokes in this area to let the rim move away from the hub, and thus remove the low spot. And in the same way, if you find a high spot, tighten the spokes in that area to pull the rim closer to the hub, and thus remove the high spot. As always, do small changes, and try not to mess up the lateral trueness too much in the process. Again check the dish regularly and make sure not to overtighten any spokes.
15. Equalize spoke tension
Now that the wheel is both laterally and radially true, its time to equalize the spoke tension. Spokes connected to the same flange should have approximately the same tension. Even tension makes for a more durable wheel! It is not a problem that the tension differs between spokes connected to the right flange and the left flange.
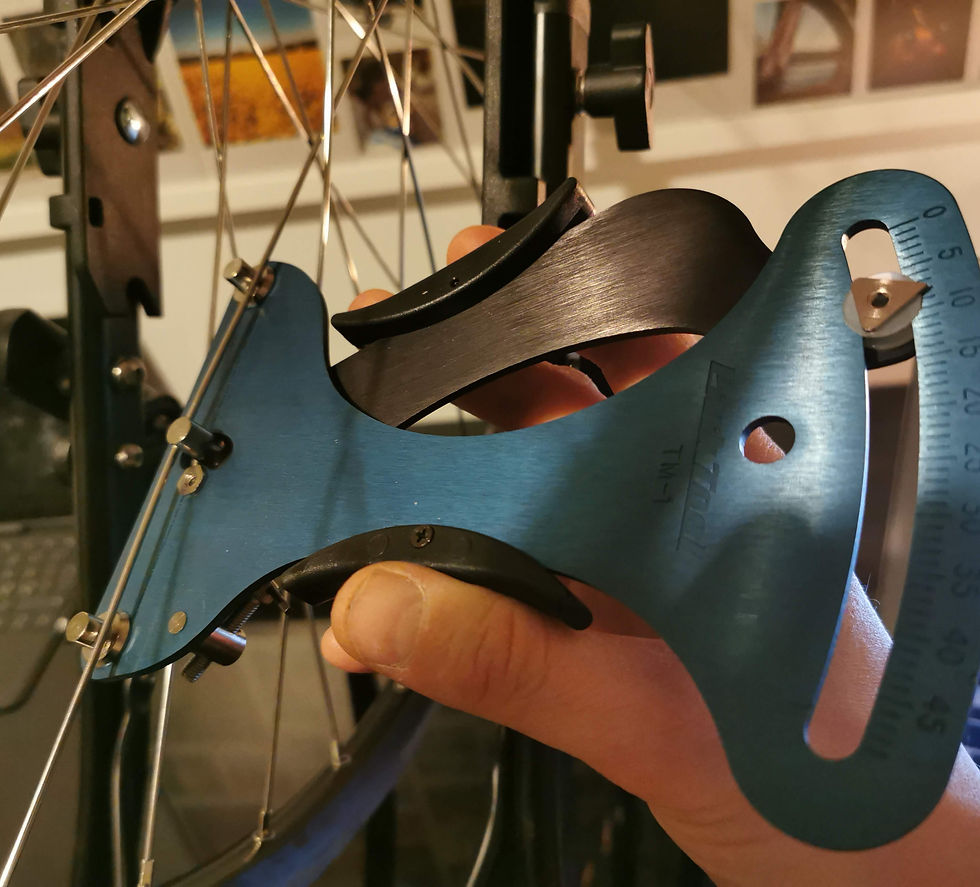
When you equalize the spoke tension it is always good to work one side of the wheel at the time. Start with the side that will end up with the highest tension. For wheels with disc brake this will be the left side, and for rear wheels it will usually be the drive side. Its most important to get the high tension side properly tensioned. The spokes on the other side just need to be within the minimum and maximum range for individual, average and relative spoke tension. The spokes on the high tension side obviously also need to be within this range. More on this below. For this exercise it is really useful to have a tension meter. Remember to make only small changes, and after completing each round, check lateral and radial trueness, as well as the dish.
16. Finalize spoke tension
The last step is to bring the wheel up to its final tension. Do this by using the techniques outlined above. And while doing so, always work one side of the wheel at the time and do full rounds, in practice that means every other spoke. After each round and each side, check lateral and radial trueness and the dish. As of today we have built five wheels in our workshop and it seems that the final tensioning often affects the lateral trueness. The radial trueness is somewhat affected, but to little extent, and the dish is usually not affected at all. Correct all such errors as soon as you detect them or suffer the consequences..
As the tension increases, be aware of spokes twisting, meaning that you are not actually tightening the spoke, but turning the spoke itself, not the nipple. This is best monitored by putting a piece of tape on the spoke, in the direction of rotation. If the tape is moving, the spoke is twisting. In that case, keep tightening the spoke until the tape is not moving, and then back of a bit, until the tape again is aligned with the direction of rotation. Failure to do this will result in the road taking care of this for you, as the spokes return to their original position as you ride, and the wheel will loose its trueness.
17. Stress relieve the wheel
An important part of the final tensioning is to stress relieve the spokes. This helps seat the spokes at the flanges and in the hub, and might even help to sort out some spoke twist that might exist. There are a few different ways to do this, but we have had the most success following the procedure described by Mr. Roger Musson in his book. The procedure is to grab pairs of parallel spokes on each side of the wheel and squeeze them together. Spokes on the same side should be squeezed together, in the same direction as the rim. Dont squeeze together spokes connected to different sides of the flange. Stress relieving the wheel should be done multiple times, but only gives an effect when the wheel is nearing its final tension. Check lateral and radial trueness after each round of stress relieving. Mr. Fleming has made an informative video tutorial that shows how to do this, as well as a few methods that should not be used.
18. Review runouts and individual, relative and average spoke tension
When the stress relieving no longer affects lateral and radial trueness, the dish is correct and the tension is within acceptable range and equalized on each side, the wheel is finished.
We like to conclude the whole process by doing a final check on lateral and radial trueness, dishing, as well as individual, relative and average spoke tension. If you have been patient and followed the steps above, there wont be any big surprises here. And if there are large anomalies at this point, you will probably have a hard time correcting them, as the tension is now quite high.
We follow Mussons guide for good trueness. We are satisfied if the lateral runout is below 0,2 mm, the radial runout is below 0,5 mm and the undesired dish runout is below 1 mm. Sometimes it can be difficult to get the dish runout below 1 mm. Unless it is way off, this is not a big problem. The most noticeable effect will be that the rim is not centered in the fork, in the worst case causing the tire to rub against one of the sides.
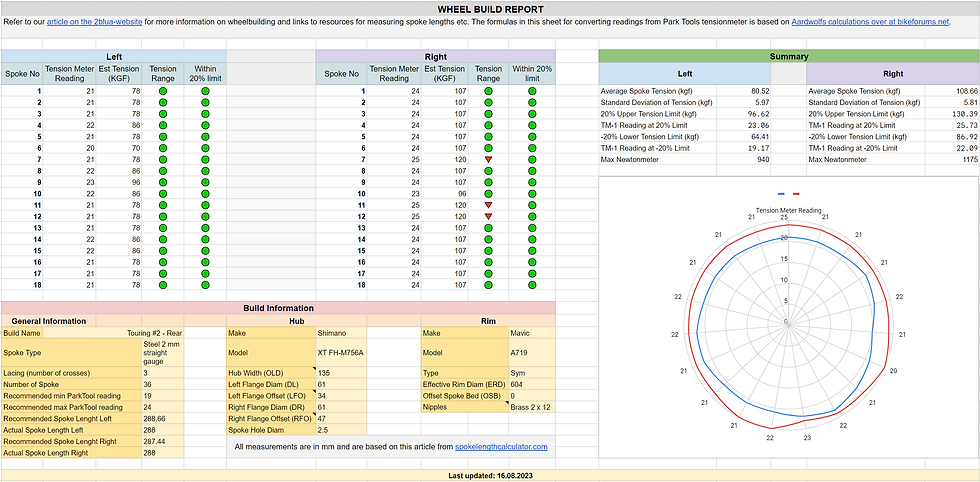
As for tension, considering that we use plain gauge steel spokes of 2 mm, we settle for anything in the range of 70 kgf to 120 kgf. This equals 20 and 25 on our Parktool tensionmeter. We read somewhere that the recommended kilograms force for these kind of spokes is from 80 kgf to 130 kgf, but yet we see many wheels that have as low as 70 kgf, so we accept such measures as well. Each spoke must be within the range mentioned above, there shall be no exceptions. The minimum and maximum tension range will vary among type of spokes, so make sure to check those ranges in advance.

The average spoke tension is the sum of the individual spoke tension measurements, divided by the number of spokes. Each wheel has two averages, one on each side. They need not be the same, and probably wont be either, particularly not on wheels with disc brakes or rear wheels. Nevertheless, the average spoke tension should obviously be within the minimum and maximum tension range mentioned above, regardless of which side of the wheel you measure.
Relative tension is the tension of a spoke in comparison to the average spoke tension on a given side of the wheel. To measure this, first determine the average spoke tension on that side of the wheel you are working with, and then simply compare tensions for each spoke on the average spoke tension on the same side. And as always, work one side of the wheel at the time, since the average spoke tension most likely will be different for each side. We gather that acceptable relative tension is +/- 20% of the average tension.
We use the calculator available from ... to record our numbers and do the math. It also has the advantage of producing a neat little test report. Link to this tool..
Our most important take away from this exercise is that wheel building is all about small steps, working each side of the wheel full rounds, and iterate between lateral trueness, radial trueness, dishing and tension, back and forth, back and forth!


Comments